Monday 27 July 2009

Doorstop Heater Block

Wandering B'n'Q the other day, I checked the bargain bin and found this:
From ResistorHeater

It is a brass doorstop: Basically a 1 inch brass rod with a M6 threaded hole down the centre. It's just about the right size to make a heater block! And, it's reduced to £3!
I picked one up to play with.

Closer inspection revealed that the central threaded hole projects all the way through the block, stopping at the small indent for the O-ring.

I hacksawed through at the indent, cutting off a 20mm chunk - the m6 thread goes right through.
I drilled a couple of 6.5mm holes through for my resistors - and widened them a little, as my resistors are not straight, and added a small hole for a themistor.
Widening half the m6 thread to m8 allows me to screw in a Peek insulator.
From ResistorHeater

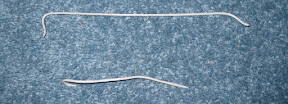
Here's a pic of the components:
From ResistorHeater

and assembled:
From ResistorHeater

Firing it up, I found that it reaches 220C in about 7 minutes, with no insulation. The heater seems pretty sturdy and well-attached. Starting up my (fixed) BfB extruder drive, I waited expectantly....
From ResistorHeater

Hurrah! It extruded several cm of filament - reasonably quick too!

If it starts up again later, then I might be able to build something soon!

Extrusion: 220C at motor speed of 120/255. Nozzle 0.8mm welding tip, 1.01mm filament

Fings I av Fixed.

Since starting to build my RepRap, I've fixed much more around the house. Having the tools to hand, and having the confidence to try, means that I've fixed things where previously I would have thrown them away.

I've replaced the power plugs on two of our laptops several times.
I've fixed one of the laptops - including disassembling it, taking out the main PCB, de-soldering and changing over two SMT microswitches, and replacing the power socket.
I've fixed a couple of battery-operated kid's toys - simple things like disconnected wires and broken solder joints.
Recently, when the telephone cable was accidentally cut during some gardening, I replaced the whole section of cable - the old cable was past it, not worth joining.
I fixed a doll's arm back on.
I fixed the bathroom door lock - and several other jobs in the home, mainly because the tools were available and handy.

Also, I taught my daughter to solder - making a 'game of life' kit together. It went really well, and worked first time!

All this (indirectly) because of my RepRap.

Heater Blocks

In my quest to ignore conventional wisdom and make my own extruder, I've started playing around with resistor heaters in blocks like NopHead.

I looked around for a while, and found a mild steel block (30x30x10mm) at my local engineering suppliers. They also supplied me a couple of 1 inch (25mm) cubes of copper.

With one of the steel blocks, I drilled two 7.5mm holes laterally and filled them each with a resistor wrapped in tinfoil to provide a tight fit (and better heat transfer). I drilled a 5.5mm hole through the block and tapped it to M6 thread.
From ResistorHeater
With an M6 welding tip, I extended the m6 thread to all the way down the barrel. Then, drilling it out to 3.2mm, I made a mistake and drilled it all the way through. I now had a short copper tube with m6 outer thread. This screwed through the heater block, leaving 5mm top and bottom. The existing BfB nozzle screws nicely onto the copper thread.

Screwing a m6 coupling nut onto the top allows me to connect a drilled stainless steel bolt. Stainless steel is a poor conductor of heat - not as good as PTFE insulation, but helps stop the heat transfer up the shaft.
From ResistorHeater
Firing it up, there is a lot of thermal inertia - it takes a while to get going (2-3C per second). It finally tops out at 210C without any insulation. The stainless is not a brilliant insulator - it gets fairly hot (70C) at the washer/support end, but should be usable.

Tuesday 21 July 2009

Learning more and more

I've been building more nozzles and drilling some holes in metal. I tried drilling out a stainless steel bolt to make the extruder barrel, but it was hard work and didn't feel right. Usually when that happens, I'm doing something wrong...
So, I googled and read up on drilling into stainless steel.

Apparently, when the drill rubs over the metal in the hole, it starts to heat and work harden a thin layer of steel - making it harder and stronger - and more difficult to drill.

The advice is to drill at a slow to medium speed, apply lots of pressure, and drill few mm then pull right back to clear the swarf. This is pretty much the opposite of my original technique.

This works *really* well - you get lovely long spirals of swarf (razor sharp splinters) and the hole is much easier to drill. I found it much easier to drill out welding tips and have drilled a couple of stainless bolts using the afghan lathe technique.

Top Tip: Read instructions before using.