I made a swivel knife. It's a specialist leatherworking tool, able to make controlled curves for patterns.

A quick how-to follows - more a list of what I did, rather than the best way to do it.
http://www.flickr.com/photos/56285539@N06/sets/72157635292717181
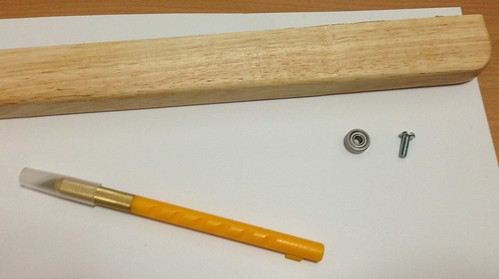
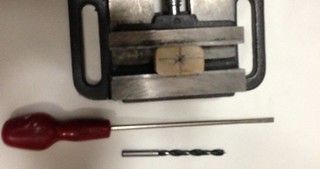
Parts needed:
- Scrap wood - preferably tight-grained hardwood (mine is from an old chopping board)
- Craft knife from the pound shop. Plastic or aluminium should both work
- Ball-bearing. I have several from an old 3d printer (624?) Internal diameter is 4mm, outside 12.9mm? They are the ones commonly used for RC cars.
- M4 25mm machine screw
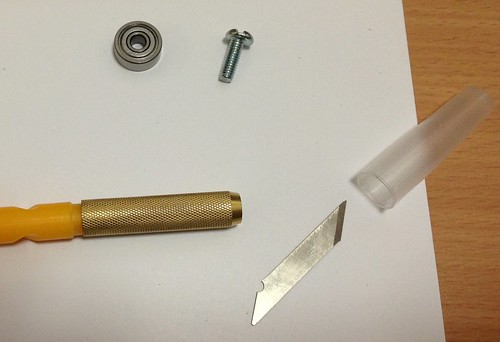
Remove the blade and put it somewhere safe
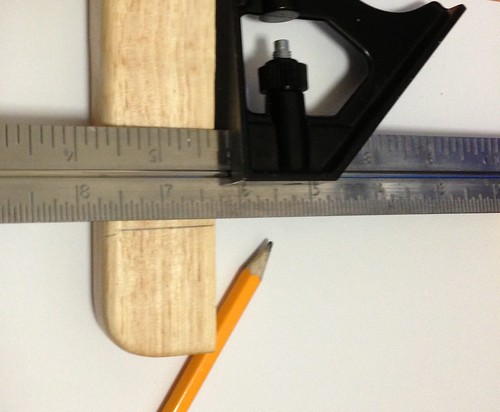
Mark out a small block (50mm). My scrap was 20mm x 34mm. Cut off.
Mark centre and find a screwdriver. Select a drill just larger than the screwdriver tip. Note the drill can be smaller than the screw/bolt head.
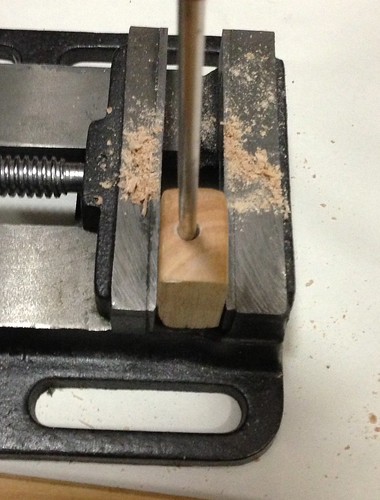
Drill right through the block (onto scrap wood!) and check the screwdriver fits.

Drill about 10mm in with a large drill - 12mm if possible. I only had 10mm.

I didn't have a large enough drill, but I found a countersink bit which was about 12.5mm - perfect. I wanted a *slightly* smaller hole than the bearing.

I now have a stepped hole - about 5mm down at 12.5mm, another few mm at 10mm, and the rest at 5mm

I then drew on a rough finger guard shape, and cut out with junior hacksaw and chisels.

*improvised lathe* I mounted it on a masonry drill to smooth off the rough edges. Handily, the shank of the masonry drill was the same as the hole size, but the thread was slightly larger. This allowed me to securely screw the block onto the drill thread. *wear eye protection and mount drill in vice*. I could then use a chisel and sandpaper to smooth the block. This would be easier on a lathe, or could be skipped entirely with enough time and hand sanding.

Smoothed block. Continue sanding and tidying. I used sandpaper wrapped around a chisel handle to smooth the finger guard.

Finished sanding/got bored. Could also add surface finish/dye/varnish at this point.

Hold the knife and block, and estimate how much height you need. Mark the knife handle and cut off with hacksaw.

Drill a 3mm diameter 20mm deep hole in the end of the handle. Mounting the work in the chuck and the drill in the vice will help centre the hole and keep it true down the centre - the rotation of the work (like it does in a lathe) will push the drill to centre rather than trying to aim the drill straight. Mark the centre and start the drill slowly, and allow it to find the centre.

Sand the end, and *ever so slightly* countersink or ream the entrance to the hole - just barely. this will help you tap the hole to M4 thread. Note, if you don't have a tap handy, you can use a bolt or machine screw - just wind in carefully and it will cut it's own thread. one turn in, half turn back, repeat. This works easily in plastic but will probably work in aluminium too.

**Place the bolt into the bearing BEFORE inserting bearing into hole** Gently 'encourage' the bearing into the hole - it should fit tightly, but use care not to split your nice block. You can sand the inside of the hole to widen a little, and you can soak the wood in water to soften the edges. I got a nice tight fit on the first try, but if you have problems you can tap it in with a hammer, or use some glue if too loose.

Now you can use the screwdriver through your hole to screw the machine screw into your tapped hole.
Reassemble the blade. I have some flatter scalpel blades that I modified to fit: a strip of duck tape helped match the original 'craft' blade width.

Test cuts - seems to work OK :). Needs a bit of sharpening and polishing but does the job!